
Key Takeaways
Finding Swift parts for sale is much easier when you start with exact vehicle details rather than price alone. A careful fitment check, seller review, and pre-installation inspection can prevent an expensive mismatch.
- Match the part to the Swift’s year, generation, trim, engine, and transmission.
- Use the VIN and part number to confirm compatibility whenever possible.
- Compare genuine, aftermarket, used, and refurbished options on total value.
- Check condition, returns, warranty coverage, and seller reliability before paying.
- Use proper tools and professional help for safety-critical or complex work.
Identify the exact Suzuki Swift part you need
A small difference between two Swift variants can affect whether a component fits. Before searching, write down the vehicle’s registration details, the failed part, and any number printed on the old component. That basic record gives you a much better starting point than a broad search for Swift parts for sale.
Match the model year and generation
Begin with the model year, then check which generation and body style you have. Swift designs can change across production periods, and a headlamp, bumper, mirror, or suspension component may look similar while using different mounting points. Photos are useful for comparison, but they should support—not replace—technical fitment information.
If the car was built near a changeover year, ask the seller to confirm the production date or chassis range. This is especially helpful when listings use a general title such as “Suzuki Swift parts” without identifying the generation clearly.
Use the VIN for precise fitment
The VIN is one of the most reliable ways to narrow a parts search because it identifies the individual vehicle. Give it to the supplier when the listing offers a VIN-checking service, and keep the written confirmation with your order records. A written fitment confirmation can be valuable if the part later proves unsuitable.
A VIN check is still worth requesting when the item appears universal. Sensors, wiring, control modules, and engine-related components can vary more than their photographs suggest. If a seller will not confirm compatibility, treat that uncertainty as part of the cost.
For a second opinion before ordering, you can send a parts enquiry with the VIN and the old part number rather than relying on a vague product title.
Confirm trim, engine, and transmission details
Record the trim level, engine size, fuel type, transmission, and drivetrain layout. These details can affect brakes, axles, engine accessories, wiring, cooling components, and transmission-related parts. If you are unsure, the owner’s documents, service records, or identification plate may provide the answer.
Do not assume that two cars with the same year and badge share every component. A seller should be able to explain which vehicle details their compatibility notes cover. When those notes are incomplete, ask a direct question before buying.
Compare OEM, aftermarket, and used part numbers
Part numbers provide a more dependable comparison than appearance alone. Check the number on the original item, any superseded number supplied by the manufacturer, and the number shown in the listing. A seller may list several compatible references, but you should still verify that the replacement is intended for your exact application.
A simple comparison can help separate a genuinely suitable option from a merely similar one:
| Option | What to compare | Main question | Typical concern |
|---|---|---|---|
| Genuine OEM | Original and superseded numbers | Is it the correct factory specification? | Higher purchase price |
| Aftermarket | Brand reference and application data | Does the maker list your vehicle? | Variable quality between brands |
| Used | Donor vehicle and visible number | Is the part from a compatible Swift? | Unknown wear or history |
| Refurbished | Reconditioning scope and warranty | What was tested or replaced? | Limited documentation |
Use the table as a screening tool, not as proof of fitment. The final decision should rest on the VIN, part number, and seller’s written compatibility information.
Explore the main types of Swift parts for sale
Swift parts cover everything from visible bodywork to small clips and electrical components. The right search category depends on the symptom, the damage, and whether you are restoring the car or simply keeping it roadworthy. Sorting the need into a system first makes listings easier to compare.
Exterior body panels and lighting
Body panels, grilles, mirrors, handles, bumpers, and lamps often need a careful visual match. Compare the side, mounting tabs, connector shape, lens design, and finish, not just the general silhouette. For painted panels, remember that the listed color may not match your car exactly without paint-code confirmation.
Used exterior parts can be practical after minor damage, but ask about dents, repaired tabs, cracks, and previous paintwork. Lighting components deserve extra attention because moisture inside a lamp or a damaged adjuster can make an apparently clean item unsuitable.
Engine, transmission, and drivetrain components
Engine and drivetrain parts require more than a visual check. Identify the engine code, transmission type, and any relevant sensor or actuator reference before comparing listings. Gaskets, belts, mounts, shafts, pumps, and control components may have different specifications across variants.
For a used mechanical part, ask how it was removed and whether its operating condition was tested. A low price is less appealing if installation requires repeating labor after an unverified component fails.
Suspension, steering, and brake parts
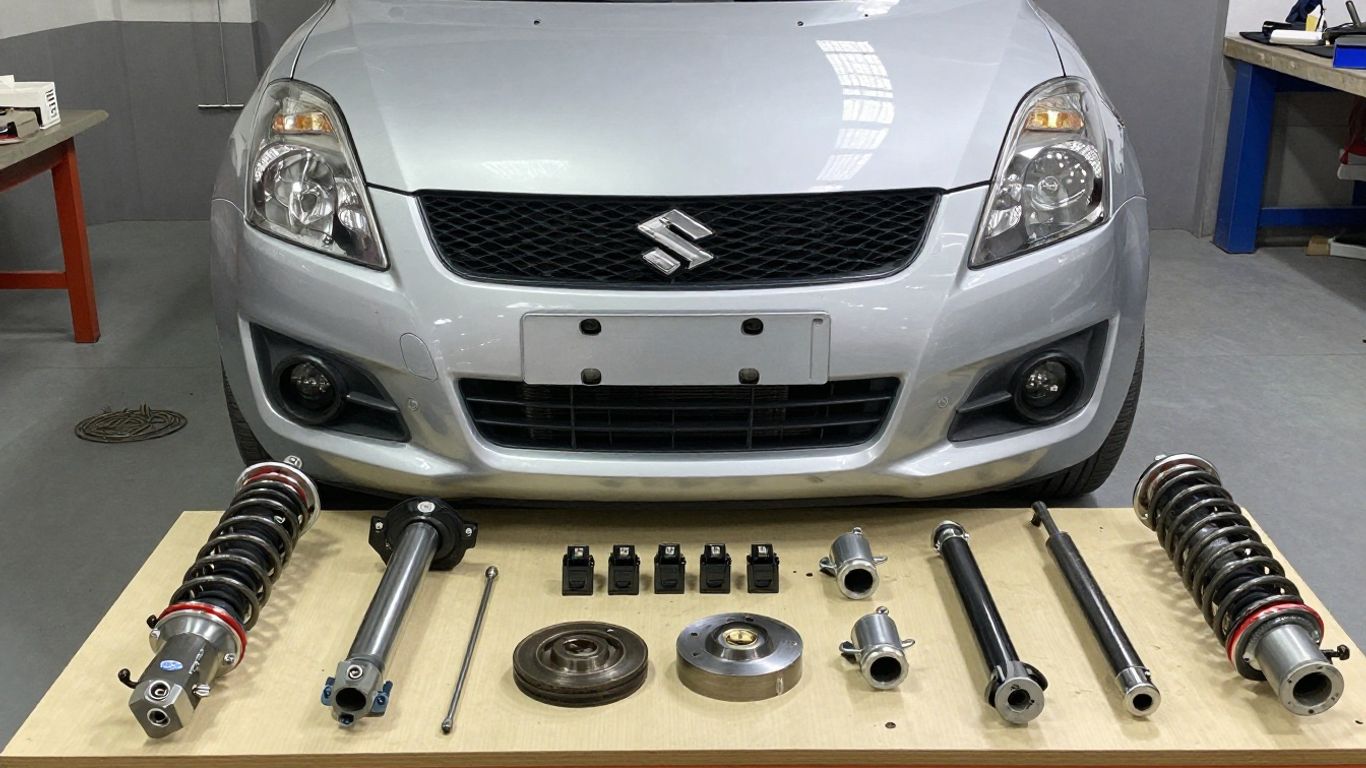
Suspension, steering, and brake parts influence how the vehicle responds and stops, so compatibility and condition take priority over cosmetic appearance. Check whether the listing is for one component or a complete axle set, and confirm left-versus-right orientation where relevant.
Look closely at bushings, threads, seals, discs, caliper surfaces, and mounting points. New fasteners or related hardware may also be required, so include them in the search rather than discovering the omission halfway through the repair.
Interior, electrical, and performance accessories
Interior trim, switches, seats, instrument components, wiring, and convenience electronics can vary by trim level. Match connector style, control layout, color, and mounting arrangement. For modules, compatibility may depend on programming or vehicle configuration, so ask whether additional setup is needed.
Performance accessories should be assessed for legal fitment, clearance, and effect on other systems. A part that installs physically may still be a poor choice if it interferes with sensors, wiring, heat protection, or normal servicing.
Choose between new, used, and refurbished parts
The cheapest listing is not always the least expensive choice once shipping, labor, and the risk of a second repair are included. New parts usually offer clearer condition, while used parts can make sense for older trim or cosmetic items. Refurbished components sit between those options, but their value depends on what the seller actually tested and replaced.
Benefits of buying genuine OEM parts
Genuine OEM parts are designed for the vehicle’s original application and are often the simplest option when exact fit, finish, or specification matters. They can be especially appealing for sensors, clips, interior details, and components where an unusual mismatch would create more work. Confirm the part number rather than assuming every factory-labeled listing is correct.
The higher price may be justified when installation is difficult or when a failure could affect other components. Still, compare warranty terms and availability before deciding that OEM is automatically the best economic choice.
When aftermarket parts offer better value
Aftermarket parts can offer better value when the manufacturer clearly lists the Swift application and the part comes with sensible quality assurance. They may also be easier to source for routine maintenance items. Compare construction, included hardware, warranty length, and independent fitment information rather than choosing solely by discount.
A reputable alternative should have a traceable part number and clear instructions. If the listing provides only a stock photo and a broad compatibility claim, the apparent saving may not justify the uncertainty.
What to check when purchasing used parts
Used parts deserve a short history lesson: ask for the donor vehicle’s year, generation, engine, transmission, and mileage where available. Request close photographs of mounting points and wear surfaces, and find out whether the item was tested before removal. For body parts, condition and color matter; for mechanical parts, history and testing matter more.
A used part is valuable only when its condition, origin, and compatibility are clear enough to price the risk.
After receiving the answers, compare the used price with a warranted new alternative. If the difference is small, the newer option may offer better value once return shipping and fitting time are considered.
Understanding refurbished and remanufactured components
“Refurbished” and “remanufactured” do not always describe the same process. Ask what was inspected, cleaned, repaired, replaced, or tested, and whether the unit was checked under operating conditions. The description should also explain what is included and whether the warranty covers labor or only the component.
A documented refurbishment process is more useful than a label by itself. Keep the invoice and warranty terms, and confirm that the replacement procedure does not require coding, calibration, or a separate core return.
Evaluate sellers and online listings
A good listing answers practical questions before you have to ask them. It identifies the vehicle application, part condition, reference number, inclusions, delivery terms, and return process. Treat missing information as a reason to investigate, not as an invitation to guess.
Check seller reviews and return policies
Read recent reviews for signs of accurate descriptions, careful packaging, responsive communication, and sensible handling of returns. A high rating is useful, but the written detail matters more when you are buying a delicate lamp, electronic module, or large body panel.
Read the return policy before ordering, including any restocking fee, time limit, testing requirement, and responsibility for return freight. Save a copy of the listing because product descriptions can change after purchase.
Read product descriptions and compatibility notes
Look for exact references to year, generation, engine, transmission, side, body style, and connector type. Terms such as “fits many models” or “may suit” should prompt a direct question. The description should also state whether brackets, bulbs, sensors, gaskets, or mounting hardware are included.
Do not treat a vehicle selector as a complete guarantee if the seller’s notes contradict it. Ask for clarification in writing and keep the response with your order details. That small habit can make a return much simpler.
Request photos, measurements, and part numbers
For used or visually variable parts, request photographs of every mounting face, label, connector, and damaged area. Measurements can help with panels, trim, wheels, and brackets, while a clear part-number photograph can settle an ambiguity that a title cannot.
Be specific about what you need to see. A request for the rear of a lamp or the connector on a module is more useful than asking generally whether the item is “in good condition.”
Compare total prices across multiple suppliers
Compare the delivered price, not just the headline figure. Include shipping, taxes, core charges, required hardware, return freight, and any fitting or programming cost. A supplier with a slightly higher item price may be the better choice if the part is better documented and easier to return.
Use the same specification when comparing offers. Otherwise, you may accidentally compare a tested assembly with an untested bare component and mistake the lower price for a bargain.
Inspect Swift parts before buying or installing
Inspection is the point where a promising listing becomes a practical decision. New parts should be checked for packaging damage and correct labeling; used parts need a closer review of wear, corrosion, and previous repairs. Even a confirmed fitment does not guarantee that an item arrived undamaged.
Look for wear, corrosion, and accident damage
Examine seams, tabs, threads, seals, electrical pins, and machined surfaces under good light. Rust, fluid residue, fresh paint over damage, bent brackets, or uneven wear can reveal a problem that is not obvious in a listing photograph. Compare the replacement with the old part before removing anything else.
For body panels and lamps, inspect corners and mounting points first because those areas commonly suffer hidden damage. Photograph the parcel and the part before installation if its condition is questionable.
Verify electrical and mechanical functionality
Test electrical parts using the correct procedure and tools rather than applying power casually. Check connectors for bent pins and confirm that the component’s reference matches the vehicle. Mechanical parts should move, rotate, seal, or measure as specified, depending on their function.
If a component requires vehicle diagnostics, coding, or calibration, establish that requirement before fitting. A part can be physically correct yet still need a separate setup step before it operates normally.
Check safety-critical components carefully
Brakes, steering, suspension, restraints, tires, and structural parts deserve a higher inspection standard. Do not install a used safety-critical component when its history, wear, or integrity cannot be established. When in doubt, ask a qualified technician to assess it before the vehicle returns to the road.
A careful inspection is not excessive caution here. The cost of replacing a questionable part is small compared with the consequences of a failure during driving.
Confirm warranties and guarantees
Read the warranty before installation because some sellers require professional fitting, documented testing, or specific installation steps. Check the coverage period, exclusions, claim process, and whether labor, diagnosis, or return shipping is included. Keep the invoice, messages, photographs, and packaging until the part has proved reliable.
Do not discard the old component immediately if it may be needed for a core return or warranty assessment. Clear records make a fair claim easier to process.
Order and install Suzuki Swift parts with confidence
Once the part is confirmed, the final stage is mostly preparation. Check the order line by line, confirm the delivery address, and make sure the selected variant matches the information you supplied. A few minutes before checkout can save a long delay after delivery.
Calculate shipping, taxes, and delivery times
Ask when the part will actually dispatch, not only how long transit is expected to take. Large panels, fragile lamps, and heavy drivetrain components may use different freight services and packaging. Add taxes, remote-area charges, core deposits, and possible return costs to your comparison.
If the car is needed for work or travel, allow time for inspection and any follow-up order. A cheap part that arrives after the repair deadline may not be the practical choice.
Prepare the tools and installation instructions
Read the installation instructions before starting and check that you have the required sockets, torque tools, supports, seals, clips, fluids, and electrical equipment. Clean the work area so small fasteners do not disappear, and photograph wiring or hose routing before disassembly.
Follow the vehicle’s service information for torque settings and adjustment procedures. Avoid forcing a component into place; resistance can indicate a wrong variant, trapped wiring, or a missing bracket.
Decide when professional fitting is necessary
Professional fitting is sensible for brakes, steering, suspension, airbags, timing components, transmissions, and work requiring programming or calibration. A technician can also identify a related fault that caused the original part to fail. If you lack safe lifting equipment or a reliable way to verify the repair, the job should not be improvised.
For simpler trim or accessory work, careful home installation may be reasonable when the instructions are clear. Stop if the part does not align, the fasteners do not match, or a warning light appears afterward.
Dispose of replaced parts responsibly
Separate metal, plastic, glass, fluids, batteries, and electronic components where possible. Some old parts can be returned as cores, while oils, coolant, brake fluid, and damaged batteries should go through appropriate collection services rather than household waste.
Ask the supplier, workshop, or local recycling facility about accepted materials. Responsible disposal keeps the repair area safer and may preserve a refund or core-credit opportunity.
Find Your Swift Part
When you want help confirming a part before ordering, contact the parts team with your VIN, vehicle details, and the number from the original component.
Conclusion
The best Suzuki Swift part is not simply the one with the lowest advertised price; it is the one that fits your exact vehicle, arrives in the promised condition, and remains economical after delivery and installation are counted. Verify the details, compare the whole offer, and inspect carefully before putting the car back on the road.